
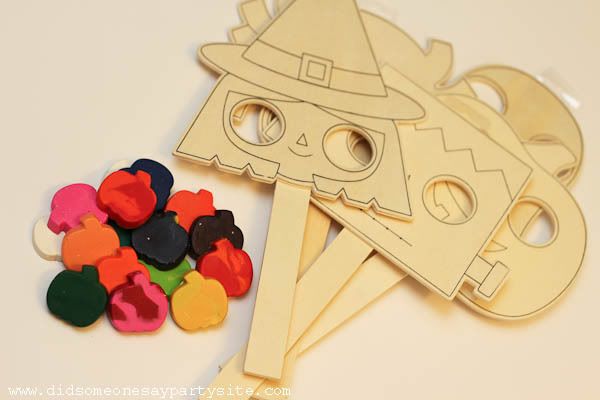
My three year old LOVES to dress up in costumes year round! When I found some cute wooden masks on sticks at JoAnn's for $1.50, I picked them up right away. We had fun coloring them together and still play with them all the time. So on my last trip to the store I was so excited to see a variety of these wooden masks in Halloween themed characters, just waiting to be decorated (and conveniently on sale for 30% off!). I knew they would make a perfect treat for my son's preschool classmates at Halloween. Of course they would also make adorable Halloween party favors!
The masks are so adorable on their own, but I decided to add a special touch with some creative supplies for the kiddos to use in decorating their masks. Of course you could pick up a box of crayons or paints and be done, but I wanted to get a little crafty. I made some simple shaped crayons instead! It is so easy to make your own shaped crayons! I always pick up a dozen or so boxes of crayons on clearance after the back to school sales to have on hand for such a reason!
Shaped Crayons
Supplies:
Silicone Baking Mold (Mine was pumpkin shaped)
Used or New Crayons
I found each pumpkin took only about 2 crayons to fill. I'd decided to give each child three to go with their mask, so I calculated out the number of crayons I needed. Then get to work peeling them. TIP: I find the larger and triangular crayons peel MUCH easier!
Then preheat your oven to 275 degrees.
Break the crayons and place in your molds. When making crayons with silicone molds, you can get creative with combining colors and get beautiful swirled crayons. I wanted my crayons to be pretty easy for the little ones to use in decorating their masks, so I kept it simple. Most of the molds I filled with one color, but a did make quite a few with two similar colors to get some pretty swirled ones. Be careful to keep the crayon pieces in their cavity - you don't want to overfill.
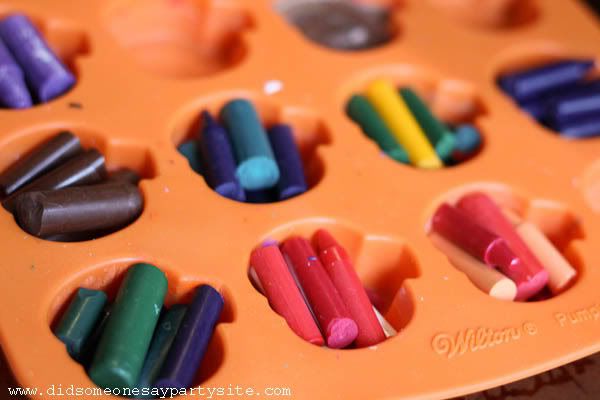
Place your silicone mold on a cookie sheet and bake for 15-20 minutes, or until the wax has completely melted. Trust me, you need to use the cookie sheet - the silicone mold does not have enough structure to remove after the wax is melted (yep, made that mistake myself the first time!). Remove the cookie sheet carefully so as not to spill and let cool in the mold for at least 90 minutes. Once they are cool they just pop right out!
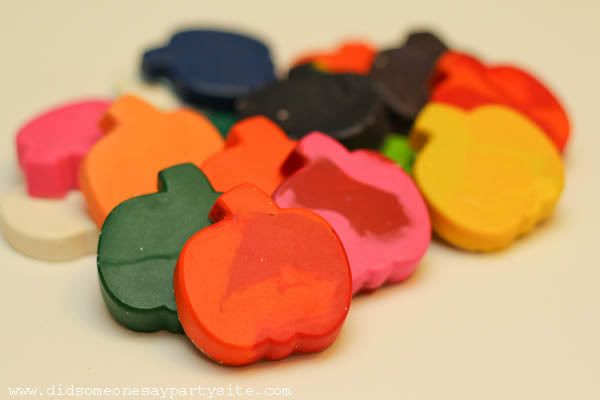
Then I took some simple plastic Halloween treat bags and filled them with three different color pumpkin crayons. With color coordinated yarn I tied them shut and attached them to the mask.
It was such an easy craft and makes for a fun treat for the little ones - and bonus that it does not involve more candy!!
To hand them out to his classmates, I'll display them in some mason jars and let the little ones choose their favorite.

Hope you've enjoyed this simple Halloween favor! JoAnn's seems to carry different masks for different seasons, so this would also work for a birthday party favor with different shaped crayons too!

Linking to:


1 comments:
I saw molds like this at the Dollar Store! Fun idea!
Post a Comment