Showing posts with label Christmas. Show all posts

Monday, December 26, 2011

Cookie Exchange Party - Holiday Sweet Treats Printables

Happy Holidays, and Happy Birthday to my sweet 4 year old today!!


Hope you are enjoying the holiday break. Just in case you missed it I thought we'd share a guest post we did at The CSI Project last week.  With the winter theme, these would still be cute for a New Year's party! Or use the recipe cards to attach to baked good gifts! Have a great New Year's and see you back here next week!


Hi there! Heather here from Did Someone Say Party and I’m thrilled to be back with you today to share some fun ideas for a Cookie Exchange! We have a great gang of girls that have a cookie exchange every year, so this is one of our favorite holiday traditions! Today we are sharing some free printables to add a special and simple touch to your cookie exchange!


I love to discover new baking recipes, which is one of my most favorite parts of a cookie exchange. Email your guests this sweet recipe card printable in advance of the party. They can print it out on cardstock to write in the recipe and make copies for everyone to bring with them to the party!
Cookie Exchange-1-6
Make sure to download the front and back pages. The back page is setup so if you print them double sided the two sides line up to have extra room to continue the recipe instructions! Click the images below to download.
Holiday Sweet Treats Recipe Cards copyHoliday Sweet Treats Recipe Cards Backs copy
These recipe cards would also make super cute invitations for your event as well! Insert the name of the event under “recipe”, the host under “from the kitchen of” and all the details on the lines below. Then adhere to a cardstock mat.
Cookie Exchange-1-4
The cookies themselves make for delicious décor at your party. But cute little name tags for these treats would be a perfect addition to the table! We love to include simple little table tent cards.
Cookie Exchange-1-3
Download our free coordinating printable tent cards here. There are 6 on a sheet – print enough for every cookie recipe. Cut along the lines marked on the printable. Fold each card in half to stand like a tent. Then have your guests write in the name of the cookie when they set out their goodies.
Holiday Sweet Treats Table Tents copy
Of course these great tent cards would work for place cards or food tent cards at any holiday event!
Cookie Exchange-1-5
We hope you enjoy your free printables, and would love to see what you do with them!! For more cookie exchange ideas, come see our 2010 cookie exchange.  And come by our site today to find out more about those yummy pretzel treats in all my photos. They were a hit at our cookie exchange!

Happy Holidays!
image

Thursday, December 22, 2011

Christmas Vases

Remember my autumn vases?
IMG_3578-1
I wanted to decorate them for Christmas, but have so much on my to do list this month. So I cheated. I took out the fall colors and went with it! Add a cheery bowl of jingle bells and voila! Thirty second centerpiece!
IMG_4269-1


We wish you a joyful and peaceful holiday!!

image_thumb[1]

Wednesday, December 21, 2011

Holiday Wrapping with Dishcloths

I am in love with unique gift wrapping ideas. In fact I have a whole giant crazy pinterest board dedicated to it! So I was excited when I discovered these simple dishcloths at Ikea for $0.79. Yep, less than $1.

They are nice and large, which is perfect for wrapping a nice little box. They are also perfect to use in place of tissue.
Ornament-1-11


By the way, have you seen the Christmas gift bags in the Dollar Spot at Target this season? So cute!! That means this gift’s wrapping cost $1.79, and about 2.5 seconds.


At our annual cookie exchange/handmade gift exchange, I brought some handmade ornaments (some of the mini-wreath ones and a button ornament). I packaged them up in a little hobo sack made from the dishcloth. I tied it closed with a green yarn pom, a jingle bell looped on some of my favorite baker’s twine and a punched tag with a stamped sentiment.
IMG_4271-1
I am headed back to IKEA this week to grab a dozen more. I love them so much – it’s like a bonus gift for your recipient, not to mention a very green way to wrap! And the price really can’t be beat!


Have you used fabric to wrap a gift before?
image

Monday, December 19, 2011

Christmas Popcorn Mix

I love to give handmade gifts, but often run out of time in the holiday season. Giving food gifts is a wonderful way to give inexpensive handmade gifts with much less time investment – you can easily make bulk items that you can give to many people in no more time than it takes to make one gift.
Chocolate Peanut Butter Pretzel Popcorn copy
This year I made a homemade popcorn mix to give our neighbors, the mailman, the milkman, teachers at my son’s school and other friends. It is ridiculously addictive and super easy to make in a big batch.
Ornament-1-2
Chocolate Peanut Butter Pretzel Popcorn
Ingredients:
1-1/2 Cups Popcorn Kernels (yields about 9 cups popped)
2-16 oz packages of white chocolate chips melted
1/2 cup peanut butter chips
1/2 cup dark chocolate chips (or bar chocolate – I used TJ’s)
Salt

Pretzels
Holiday M&Ms (I used a bag of peanut butter and a bag of pretzel)


Directions:
1. Pop your popcorn. Did you know you can make popcorn in the microwave with just a brown paper lunch bag? SO EASY! I don’t have a popper, so I used these instructions and made three batches.
2. Spread the popcorn out on baking sheets. Salt the popcorn and sprinkle the pretzels in.


Ornament-1-3
3. Melt the white chocolate chips in the microwave or a double boiler.
4. Drizzle the white chocolate over the popcorn pretzel mix. Toss if needed to get even coverage.
5. Sprinkle the M&Ms over the white chocolate covered mixture.


Ornament-1-4
6. Melt the peanut butter and chocolate chips together in the microwave or double boiler.
7. Drizzle melted peanut butter/chocolate mixture over the popcorn mix.


Ornament-1-5
8. Let air dry and portion out into your container of choice!


Ornament-1-8
Instead of just giving them in little baggies or plastic wrap, I used these cute little peppermint striped gabled boxes at Target. They are so cute and have little plastic windows to give a peek at the yummy contents. And the best part? They are from the Dollar Spot!


I tied them closed with some pre-printed ribbon I purchased from Pick Your Plum – no gift tag needed. Of course we may have taste tested a little bit too!


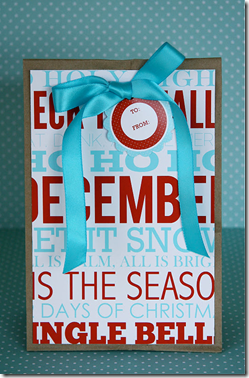
This made about 12-15 sandwich bags worth of goodies. If you want to give larger batches than these little boxes would fill, check out this cute bag from It Is What It Is.


image
Beth has this adorable subway print as a free download, which she also cut down to put on the front of a simple paper lunch sack. So cute!


image

Linking to:
Tip Junkie handmade projectsTodays Creative BlogSomewhat Simple 

Peanut Butter Pretzel Bites & a Guest Post!

You can find me (and a couple free downloads!) over at The CSI Project today posting about Cookie Exchanges! We had our cookie exchange last week and I made these delicious Nutella and Peanut Butter Pretzel Bites!
Ornament-1-10
I followed the recipe from Buns in My Oven, but added my own little twist. I swirled half a cup of Nutella (because everything is better with Nutella) in with the peanut butter mixture. Then after I dunked the pretzel sandwiches in melted dark chocolate, I sprinkled a little sea salt on some of them before the chocolate dried. YUM!!
Cookie Exchange (1 of 1)-2
Make sure to head over to The CSI Project today!!
image_thumb[2]

Friday, December 16, 2011

Button Ornaments

My sister has been my craft inspiration for as long as I remember. When her teenaged son was little, she would make all sorts of crafts and sell them at fairs (in addition to being a full time working mom). I still have a bunch of her beautiful wares in my home, including our most favorite – a felt stuffed turkey for Thanksgiving! 


We decided that it would be fun to work together on some crafts throughout the year together. We planned to pick a source of inspiration, then each would do their own thing and compare.


Last month, I chose this button tree by Maximum Rabbit Designs (LOVE!!) as our inspiration!
image


I have to admit, I’m a bit of a lazy crafter. Or maybe just an impatient one? But the idea of filling an entire styrofoam tree with buttons sounded like a BIG time commitment. Then I remembered those cute paper flower pomander balls (check out G’s super cute ones here) and decided to make ornaments instead. I found this inspiration via Pinterest and set out making my ornaments. So easy!
IMG_4213-1
I picked up pearl tipped pins in red, pearl and white and buttons in lime green, red and pearl. Most of the buttons I had on hand, but these need a LOT of buttons so I had to supplement. Then I filled in the balls – so easy! I attached some ribbon with pins for the loops and was done! These were fast, and definitely easy to do while my preschooler was working on his own crafts!
IMG_4171-1
IMG_4170-1
IMG_4218-1
image
Linking to:
Tip Junkie handmade projectsTodays Creative BlogSomewhat SimpleVisit thecsiproject.com hbcbuttonFun Stuff Fridays

Thursday, December 15, 2011

Mini Wreath Challenge: H’s Ornaments

I had far too much fun with this challenge! There was something about whipping up little ornaments in 5 minutes that made me go slightly overboard and I loved every minute!


I started trying to replicate this great wreath ornament my sister made. But alas, our wreaths were thicker and they just didn’t look quite as cute as hers!!Ornament-1-2
But that didn’t stop me! You probably already realize that I’m a crazy craft supply shopper – more so than a crafter. So it was fun to shop from my stash to create these little goodies! Here’s what I came up with!
Handmade Ornament 1-2Handmade Ornament 7Handmade Ornament 2
1. This one used some great lace hem tape (you can find it near the ricrac and bias tape!). I just wrapped it around to cover the wreath. Then with a rhinestone brad to attach doily cut with my favorite punch! 

2. On this wreath I used some beautiful ribbon from American Crafts to wrap my wreath. Then I repurposed a charm that came on a candle I received as a gift. 


3. This wreath I did buy for  - I picked up some mini-bead garland at JoAnns and wrapped it around the wreath. Then I used hot glue to adorn some mini cabochon flowers. I used the hem tape from the first ornament to create the hanger.

Handmade Ornament 3Handmade Ornament 6
4. I followed the larger thumbtack concept with this one, using simple silver thumbtacks to cover the base of the wreath. Then I used some colored thumbtacks to add a little decoration. This one is HEAVY! 

5. Using my favorite red and white baker’s twine, I wrapped this wreath like a yarn wreath. Then I attached some cute green buttons and a plaid ribbon for a hanger.

These last two are my favorites!
Handmade Ornament 5Handmade Ornament 4
6. Once I realized my rag wreath was a failure, I took off the strips of fabric and wrapped them all the way around the wreath, leaving the rough tattered edges exposed. Then I attached three small jingle bells and some small felt leaves I freehand cut. Cute! 

7. I used my favorite fuzzy yarn on this simple yarn wreath. Then I pulled out my scrapbooking supplies to adorn it with three rhinestone star brads and a fabric word tag. I used simple jute to create the hanger on this one!


So much fun! Make sure to check out yesterday’s post to see G’s charming yarn and beaded wreaths! Hope you enjoyed our mini wreath challenge – I know we did!
image

Linking to:
Tip Junkie handmade projectsTodays Creative BlogSomewhat SimpleVisit thecsiproject.comhbcbutton
Fun Stuff Fridays
Related Posts Plugin for WordPress, Blogger...